

Bonsai
We decided, on our fortieth wedding anniversary, to try something new in establishing our own little Bonsai garden. We watched a few videos and we attended a beginner's class at Bonsai Art in Heatherton. Trevor runs the business, is very knowledgeable and helped us choose some starter plants. Barry showed us the very basics of how to re-pot a plant and how to begin styling it with wires. We bought a diverse range of 8 starter Bonsai plants to begin with, ranging from some just-planted ones to others a few years old with some basic styling. We then bought two un-potted plants, so we could learn about potting. The plants were nothing special in terms of quality or style, because we wanted to use them to learn as much as we could. And, wow, do we have a lot to learn! Like everyone else in our house, owls, wombats etc. we have to give them all names. We thought that we would document our progress here, to keep a record of what we did. So here goes:
Diary
December 2023: Bought 8 potted starter plants:
- Satsuki Chinzan (Rhododendron Indicum 'Chinzan') - Styled
- Shimpaku Juniper (Juniperus Chinesis) - Styled
- Cotoneaster (Cotoneaster Microphyllus) - Styled
- Juniper (Juniperus) - Syled
- Japanese Maple (Acer Palmatum 'Sango Kaku') - Unstyled
- Port Jackson Fig (Ficus rubiginosa) - Styled
- Lilly Pilly (syzygium) - Unstyled
- White Serissa (Serissa Japonica) - Unstyled
December 2023: Bought 2 un-potted starter plants:
- Satsuki Summer Sun (Rhododendron Indicum 'Summer Sun') - Unstyled
- Satsuki Aozora (Rhododendron Indicum 'Aozora') - Unstyled
December 2023:
- Gave all of our new plants names - See below.
- Re-potted Summer and Zora
- Styled Figgy.
Notes
- Rhododendron Indicum is also known as Indica Azalea or the Japanese Satsuki
- Like everyone else in our house, owls, wombats etc. we have to give them names.
- We potted two plants using:
- Small Bonsai pots
- Plastic mesh to cover the drain holes
- Scoria rocks for drainage
- Black anodised aluminium wire to tie the plant down
- Bonsai potting mix
- Slow release fertiliser
- We invented a tensioning device, like a turn buckle, using two hose clamps.
Satsuki Chinzan (Rhododendron Indicum 'Chinzan') - Styled
Rhododendron Indicum is also known as Indica Azalea or the Japanese Satsuki. We have two Satsukis, so we called the first one Suki. She came already styled so we just continued on making more twists and turns than a detective novel.

Suki

Suki Styled
Shimpaku Juniper (Juniperus Chinesis) - Styled
We brought this plant, which needed re-potting and pruning of some dead wood, along to our first lesson with Barry at Bonsai Art.
Barry showed us how to use the wire to 'style' the plant. The plant should be styled before it it is re-potted. First, the old styling wires are removed: Carefully hold the base of the branch and unwind the wire from the tip. Then do the same with the other branch. The trunk wire was also removed in the same way. The size of the wire required for styling depends on the size of the branch or trunk. It is typically one-third the thickness of the thickest part of the limb to be wired.
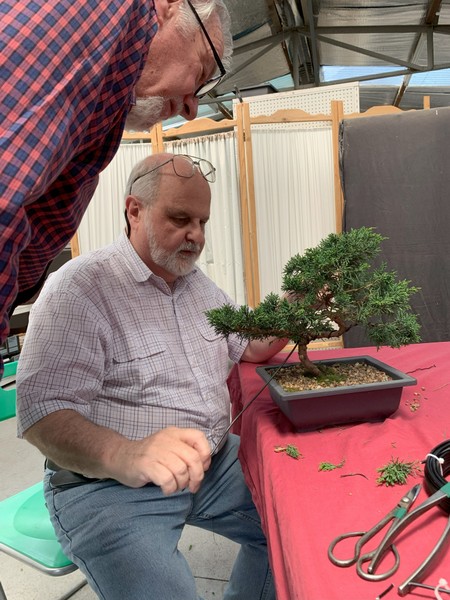
The styling wire is wound around each limb at 45 degrees. If other wires need to be wired to the same limb, they are wound in the same direction, so as not to cross the existing wires. For styling branches, commonly the wires are placed along two separate branches to by styled. This provides a good anchor for each branch. The wire is cut one-third longer than the length of the branches. Start at middle point between the branches on the trunk. In the same direction as the trunk wiring (which is always done first) carefully wind each branch from the base to the tip. Cut off and loop the wire at the tip. Then wind the other branch in the same way.

Shimi
Barry then showed us how to re-pot the plant into a new ceramic pot. The drain holes were covered with plastic mesh secured with anodised aluminium wires. A layer of coarse, brown scoria pebbles was used to provide drainage. The root system of the original plant was matted all around the original plastic pot. Barry showed us how to remove the old roots with scissors and then to tease out the roots using a chop stick. Some new potting mix and slow-release fertiliser was added. The plant was secured to the pot using the anodised aluminium wire, in two loops, over and through the root system. Finally some more potting mix and the original top-dressing pebbles and moss was added.

Shimi Re-potted
After the plant was re-potted, the under-growth from each layer was removed and the styling wires adjusted to the desired shape. Barry advised that the re-potted plant should be given a good water and rested, with no other adjustments for month, to recuperate. This will give us time to read up more about Bonsai styles and to formulate some ideas about what we would like to do with each plant.

Shimi Styled
Cotoneaster (Cotoneaster Microphyllus) - Styled
Coty had quite a few branches coming off the main trunk in horizontal layers. There is a bonsai style type a bit like this, but to be honest, we are never going to be experts at learning the names of all the bonsai style types, let alone achieving anything conforming to a particular bonsai style type. So we won't even try. We will just potter around, as we do at breakfast time every morning. We pick up one plant and just ask ourselves: "Would it look better if this was up here or over there" or "shouldn't we cut this bit off". We don't know what we are doing but we are having a wonderful time doing it.
We cut off some bits that were growing downwards and made more layers from branches that were growing upwards. That's right isn't it?

Coty

Coty Styled
Japanese Maple (Acer Palmatum 'Sango Kaku') - Unstyled
Mapy looked like she was growing very fast. To slow her down a bit we just cut off the new growth at the top. We're not at all sure what to do next.

Mapy

Mapy Styled
Port Jackson Fig (Ficus rubiginosa) - Styled
This fig bonsai was very straight and probably should have been styled a little earlier. The only styling was really just a wire holding her into the pot. The root system had started to develop with two very small buttress roots. She looked a bit ordinary. Lots of new leaf growth had started this spring and was getting out of control. Those fig leaves are wonderfully shiny, but they were getting too big.

Figgy
So how should we go about putting a little bit more bend in that straight and already quite thick trunk? Since we have no previous skill in styling, we decided to tackle this difficult task ourselves and to learn as much as we could from the experience. We would have liked to have used some turnbuckles to gradually add tension, but we didn't have any. So, in what we think is a bonsai first (Google it to see), we used two stainless-steel hose clamps connected back to back, instead. We rigged up a sling using 4 mm copper wire and a few wraps of plant-tie fabric. Tightening the hose clamps was a little tricky, but could be done better with a right-angle wrench. Next time we should turn the clamps 90 degrees. What happens next is any-one's guess. We will see and learn from our mistakes.
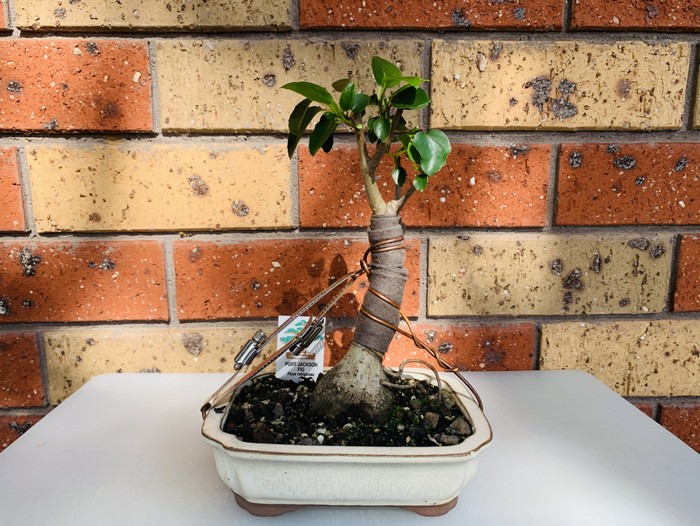
Figgy - Styled
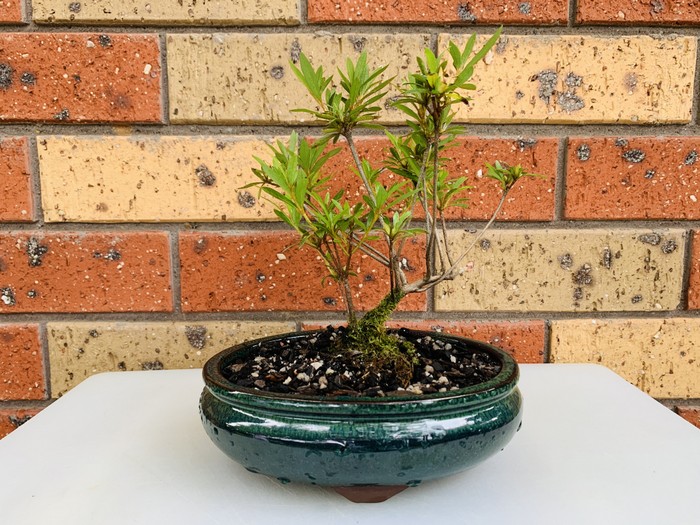
Lilly Pilly (syzygium) - Unstyled
Pilly needed a "hair cut", as we call it. We styled her branches, which were all growing upwards, so that they were more horizontal. Then they looked too long so we curved them around the trunk. We are not sure if that is right, but it does look interesting.

Pilly

Pilly Styled
White Serissa (Serissa Japonica) - Unstyled
Seri, like others, was just growing up, up, up. Her trunk was a little too straight so, using a wire going through to the drain hole in the pot, we tied it down in a nice little curve. OK, we've got this "bee in our bonnet" about "straight". Barry said "anything over 3 cm was too straight", so we are the self-appointed "straight" police.
Then we have an issue (real or not) with branches going too far out from the trunk. What are you supposed to do with them? So out comes the wire and in no time at all they are twisting around the trunk in all directions! It doesn't look like any formal bonsai style, but it is interesting to look at. We call it "swirly-curly".

Seri

Seri Styled
Satsuki Summer Sun (Rhododendron Indicum 'Summer Sun') - Unstyled
We potted two bonsai starter plants, Summer and Zora using:
- Small Bonsai pots
- Plastic mesh to cover the drain holes
- Scoria rocks for drainage
- Black anodised aluminium wire to tie the plant down
- Bonsai potting mix
- Slow release fertiliser
The first thing was to gently release these plants from their tubes. As Barry showed us: We removed any excess soil and ticked the roots out a little bit. This process reminded us of watching an ABC TV program in the 70's and 80's by Kevin Heinze, called "Sow What". Kevin always used to "tickle the roots". Later TV gardening presenters actually poo-pooed this practice, but we always thought that Kevin was right and it was a good way to start the roots heading off in the right direction in their new pot. We also cut off some roots, around the bottom which were matted, as we were shown. A YouTube video we watched emphasised the importance of misting the roots, to keep them alive, during this procedure. So we did that too.
We cut squares of the plastic mesh, to cover the drain holes in the new pots, and secured them using some aluminium styling wire. We placed some scoria in the bottom of the post for drainage, followed by a little new bonsai potting mix. Then the plant went in and we secured it to the pot using the styling wire. A little more soil and some slow release fertiliser was added. Later, when the plants have got used to their new pot, we will plant some moss and sprinkle on with some decorative stones.
Summer was just growing up and up, like the others, so we didn't really know what to do. Then we saw a bonsai style called "wind-swept". So now summer looks like she's been in a hurricane!
Summer

Summer Styled
Satsuki Aozora (Rhododendron Indicum 'Aozora') - Unstyled
Summer and Zora were new starter plants when we bought them. After re-potting we had to wait a few weeks to make sure they were feeling OK. They absolutely loved their new pots.
It was then time to start thinking about what to do next. From what we gather, reading on-line books, watching bonsai DVDs and YouTube, there are lots of different bonsai styles to choose from. Everyone just says to go with what you like, but as beginners we don't really know what a plant is supposed to look like, let alone the best approach to achieve that look. So Zora, we've decided to make you look like a fan. You might notice that we leave a lot of extra styling wire hanging out from the ends of the branches. It looks a bit ordinary, but it means as the branch grows we've go more styling wire in place. We think we are missing something important about how to stunt their growth. It probably requires us to keep clipping of new growth, but we're not sure about that.

Zora
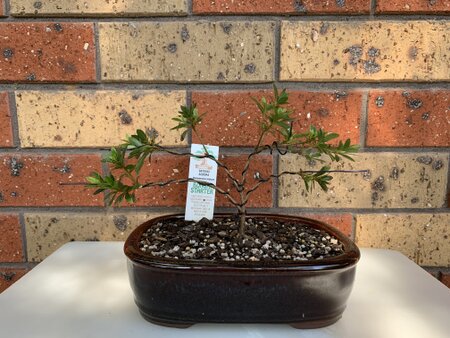
Zora Styled